- Open the Gmail App: Tap your profile picture in the top-right corner, then tap Add another account.
- Choose Account Type: Select Other.
- Enter Email Address: Type in your full DreamHost email address and tap Manual setup.
- Choose Account Type: Select Personal (IMAP).
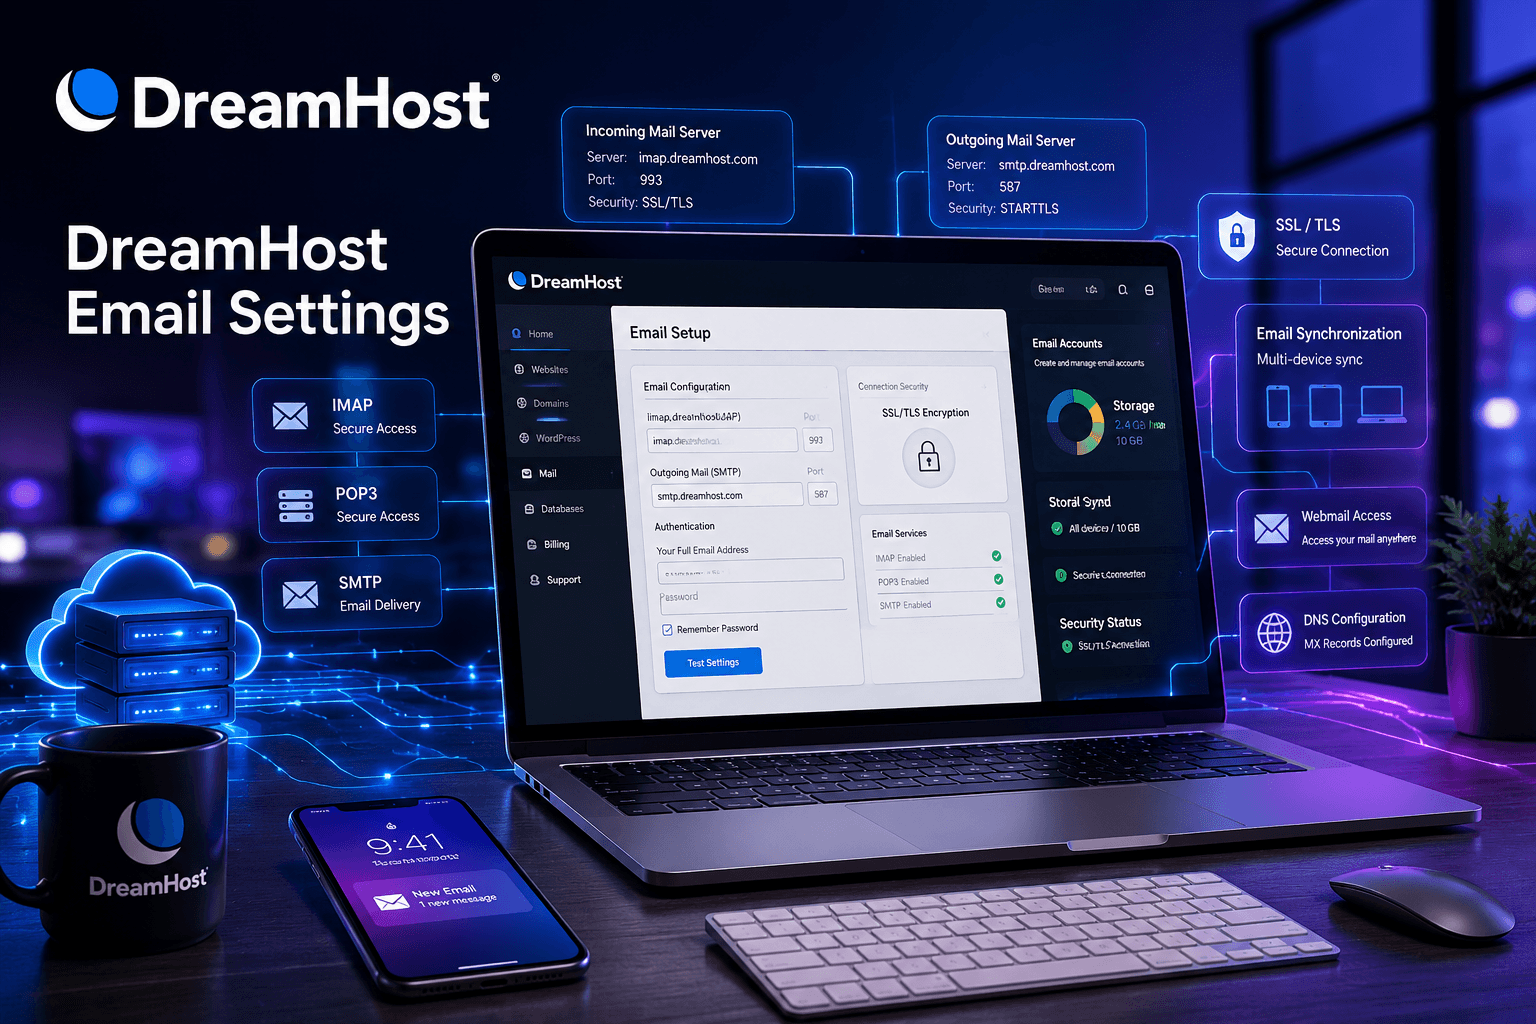
- Incoming Server Settings:
- Username: Your full DreamHost email address.
- Password: Your DreamHost email password.
- Server: imap.dreamhost.com
- Port: 993
- Security Type: SSL/TLS
- Outgoing (SMTP) Server Settings:SMTP Server: smtp.dreamhost.com
- Port: 465 (or 587)
- Security Type: SSL/TLS (or STARTTLS if using port 587)
- Username: Your full DreamHost email address.
- Password: Your DreamHost email password.
- Finish: Follow the remaining prompts to name the account and complete the setup
Setup to Setup DreamHost Email in Android Gmail App
Hope you understand How to Setup DreamHost Email on Android Phone.
Still you have any confusion or query feel free to call, mail me or simply submit the form below to get in touch anytime. I am approachable and would love to speak to you.